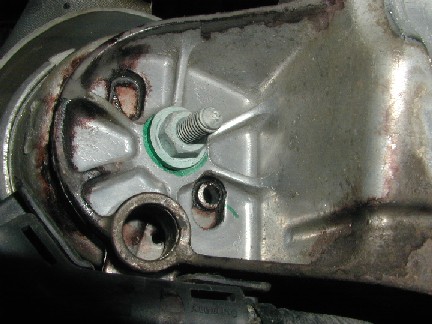
Couldn't find any good instructions, even tho several have done it. My digicam ran outta juice after one pic, sorry. (WJM-I got your back Steve)
Passenger Side Mount Removal/Installation:
FROM ABOVE:
1) Remove airbox (no other way I could get to the top nut on that motor mount) Stage 3 cars have the turbo VERY close to the mount, a K03 or K04 may have more working room.
Instead of accessing the nut from the top, I accessed it from under the car. This may not work for everybody but for me it was much easier, and did not have to touch the filter box or the heat shield.
I first used the regular size 3/8 drive to move the nut, then 1 /4 very small ratchet to undo it completely. Reverse for installation. (Comment by Jan Jonak)
2) Pull heat shield under the turbo up as far as you can to give you maximal working room.
3) Remove nut...its 13mm...you can only get a stubby wrench on it, and its too tight for that, so use a 13mm 1/4 drive socket that has a hole big enough for the bolt to come through. You won't be able to lock the socket wrench in, but you can get it in just enough to loosen it. It will come off with your fingers after that. (WJM Notes: I was able to break it free pretty easily, and then found I could get a fairly flat 1/4" driver on the nut. I had to finish the removal with the stub wrench though because as the nut backed off the 1/4" driver got pinned against the cat/heatshielding)
FROM BELOW:
4) Remove the four 13mm bolts holding the sway bar bushings to the lower frame mounts. You may need to loosen the end links (I did, WJM-So did I) and just swing the bar out of the way. 16(18)mm bolts on the end links.

5) I removed the turbo to hardpipe hose to get more working room, but it may not be necessary, YMMV (WJM-You don't need to do this at all).
6) Mark the spot where the bottom mount nut is relative to the bracket. Just draw a circle around it with a marker. Also notice where the little nub protrudes from the mount into the hole on the bracket. Look at your new mount...see how it has one nub, but the bracket has holes 180 degrees apart? This lines up the top of the mount, so mark it.

7) Remove the lower nut from the engine mount.
8) Rig up a way to hold the engine up. I used a hydraulic jack, a piece of 2x4, and a piece of 3/4" plywood to push on both the oil pan and the snub mount bracket. Don't raise the engine, or raise it just a hair so you know you have it. Make sure this is stable. I put a jackstand next to it for safety (engine's...not mine).
9) Remove the three 18mm (who the f' uses 18mm bolts...f'n Audi...had to run to the store for that) bolts holding the mount bracket to the frame. Two forward bolts aren't too bad, but you may have to invoke the name of your favorite supreme being to get the rearward bolt loose. (WJM-Breaker bar makes it easy...no problems here)
10) There is some wiring attached to the bracket, it will keep it from falling out, but it can be rotated to allow the engine mount to come out. Pull it out and grab the washer that is on top of the mount. Put it on the new mount. Slide the new mount up and into place, remembering the little nub on the bottom, and making sure the two tabs go into the slots on the top bracket. (WJM-Its hard to see, but if you look at your new mount you will see two tabs or ears on the top. These locate the mount into the bracket. When you install the new mount, you will feel it "seat" in the proper orientation, just take note of the nub side....again I think there are openings 180 deg apart so it probably doesn't matter, but might as well)
11) Push the whole assembly back into place.
12) Bolt everything back together...one caveat...it will be very hard to get the top nut tight. I got it flush by hand, then used a stubby 13mm wrench and got it fairly tight. Then I put the 13mm stubby wrench on it and used a 3/4 long wrench to push the stubby 13mm wrench. (WJM-Remember that 1/4 " ratchet? Yeah will it fit again and I was able to snug it down real easily J )
***NOTE: If doing driverside mount, fully install the passenger side mount, but do not reattach the sway bar.***
Driverside Mount Removal/Installation:
The driverside is very similar, yet easier than the passenger. Since the sway bar is disconnected all you have to do, is:
13) Remove the three screws that hold the coolant reservoir tank in position, disconnect the sensor wire, and swing the reservoir out of the way.
14) With a 13mm socket, remove the top engine mount nut.
15) It *looks* like you need to remove the cross over tube-to-intercooler hose, in order to remove the bracket, but you do not.
16) Conduct steps 6-12 from above...
17) Reattach sway bar, and retighten end links.
Be careful, work slow, you should have no trouble.
Thanks to Chad (180q) for recommending dropping the lower bracket and swaybar.
Took me about an hour total...i work slow, don't have a compressor or an impact gun :) (WJM-Took me 2hrs to do both Driver and Passenger side mounts, I'd plan for 2hrs if you are doing this with hand tools, that top nut can make or break you)
No comments:
Post a Comment